
When I was single in a past life, let’s just say sending Christmas cards wasn’t a big priority. Some years I’d feel guilty and send some out (thanks mom!)… but most years it just didn’t happen.
Jump forward to today. Having a girlfriend kind of makes sending out Christmas cards a priority. We’ve been together since 2009 and Christmas cards have been carried away by the mailman ever since. The first couple of seasons we just sent the traditional cards you buy in boxes at Target or Wal-mart. Pretty typical, but hey, no feeling guilty for not sending out Christmas cards. My mom’s pretty happy that I found someone to straighten me out. 🙂
Last year, I decided to step it up a notch. I wanted to try something that would blow our friends and families minds. My inspiration came from being a space geek and keeping up with the NASA Mars Rovers mission. Mars?!? What the…? Yep, those little rovers we sent to the next planet in our solar system have been sending back 3D photos of Mars. That’s what inspired me to make mind blowing 3D Christmas cards. I’ll have to save that tutorial for another day. But for now, read on to see how we made pop-up cards this year…
Earlier this year we bought a new house which was pretty exciting. But the lawn was… well, there was no lawn. We had a weed garden-of-fun. After 6 months we finally got our new front lawn put in. Let me tell you, this was a big deal for us. We were excited. No longer the eye-sore of the block! Such a big deal that Andrea wanted to send out a photo of our grinning faces standing in front of our new house with fresh green grass.
Since it’s only just over a week till Christmas, we weren’t looking to be super fancy. But we still wanted to do something different and cool. It also had to be a simple design that’s easy and cheap to make. After pondering ideas in my head for 2 minutes and 36 seconds, it hit me. Pop-up Christmas Cards!
Here’s how we made them.
Step 1: Taking Photos
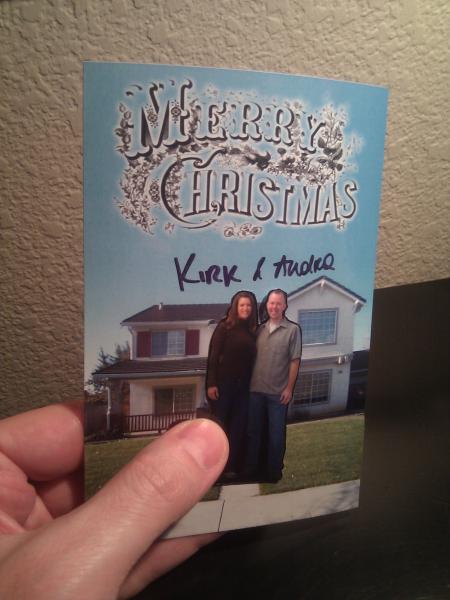
We needed to take two photos, one of us, the other of the house.

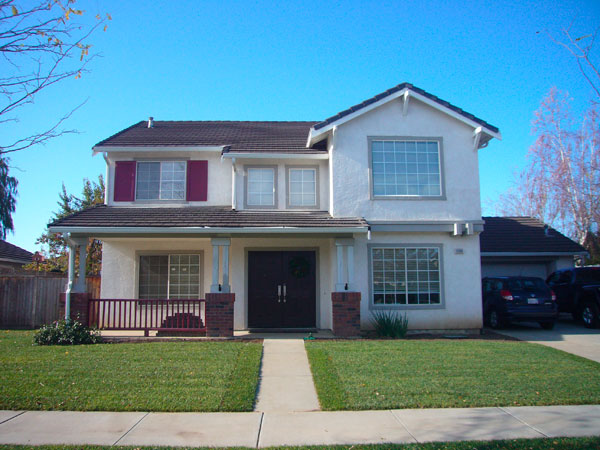
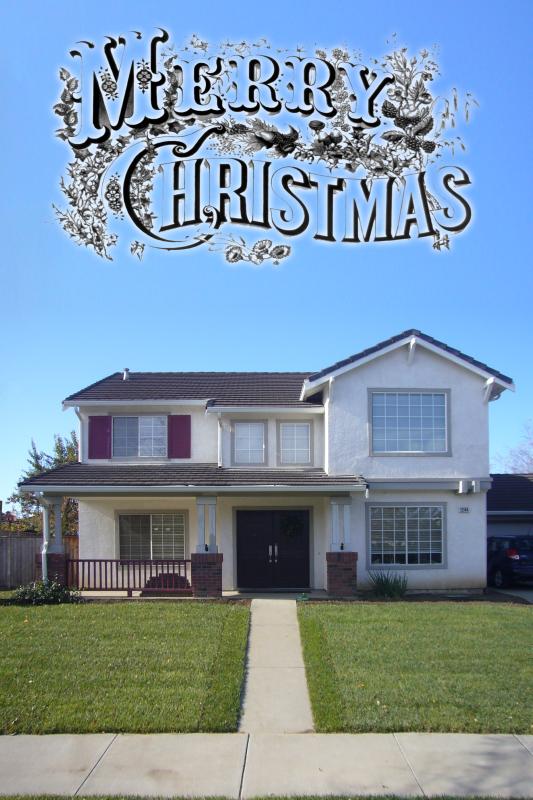
The idea is to have a photo of the house looking straight at the front. The top 45% of the card would be the sky. The middle 35% would be the house. The bottom 20% would be the walkway and lawn. We’d fold the card where the house and lawn meet. In the sky, we’d put “Merry Christmas” and sign our names.
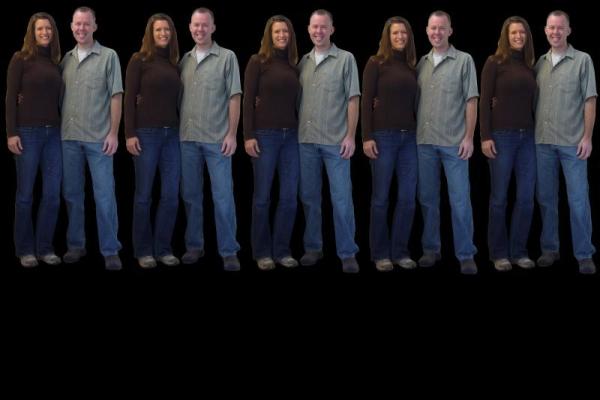
We didn’t want us in the photo of the house since we’re supposed to be the pop-up. So we had to take a second photo of us against a wall. That way we could place us below the fold on the walkway so we’re “popped up” in front of the house.
Step 2: Photo Editing Fun
I happen to use Photoshop, but you can use a photo editor like Paint.net (Windows) or GIMP (Windows/Unix/Mac/etc.) which are free.
We decided on 4×6″ prints since they were pretty inexpensive (19 cents each at the Rite-Aid down the street). That’s the size we had to our canvas to in Photoshop. I also set the resolution to 600dpi to make sure the prints would come out sharp at Rite-Aid.
I pasted the photo of our house and started manipulating the image. I needed to turn on some rulers, do some measuring, create more sky, straighten the perspective, stretch the lawn, and erase the mess the neighbor’s dog made (kidding). Finally, as a final touch, I added some “Merry Christmas” art I dug up online. A few more click and a bit more mousing around… here’s the result.
Next was to apply some Photoshop magic to the photo of us. I pasted five Kirk & Andrea’s so we’d fit on one print and here’s what I came up with. Ack! Clones!
Step 3: The Prototype
Now before I send these off to get prints made, I have to make a prototype first to make sure it’d actually “pop-up” like I imagined in my noggin. So out come two sheets of paper from my black and white printer.
A few snips with the scissors and a few folds with my fumbling fingers I came up with this little work of art.
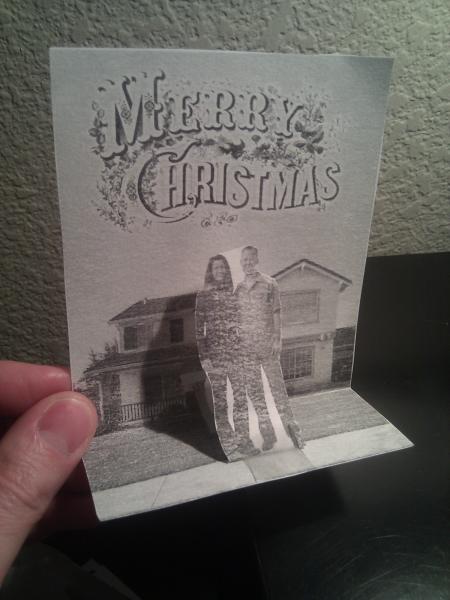
It worked! I had made a little brace to hold us up in this sample. But it turns out that I didn’t need it since the photo paper was thicker and we’d stand on our own. Good thing because making the bracket fold down wasn’t working so smooth.
At first I was going to try and make it more complex… but I quickly realized that by doing so, it’d take a LOT more time (and be a lot more frustrating)
Step 4: Prints & Assembly
50 house prints and 10 Kirk and Andrea prints later, we had our cutting and folding ‘cut’ out for us. Well, she actually did most (pretty much all) the cutting folding and taping.
We folded a flap below our feet and used double-stick tape to plant us on the walkway. The photo was thick enough where it would stand up great (with a a little chiropractic spinal manipulation). With the extra scraps, we used those to make a little kick stand on the back of the card to hold it up as you can see here.

We’re almost done. The final step was to sign, stuff, stamp, label, and mail these off to all our friends and family. That’s it… we’re all done
Here’s what the mailman brought them. Drum roll please…
If you’ve done anything like this before, let everyone know in the comments. It’d be great to see what kind of fun Christmas card ideas others have come up with. And hey, I just might have to try one of them next year. With the 3D cards last year and the pop-up cards this year… I’m starting to feel the pressure already!
Thanks for reading.

Leave a Reply